We needed a monitor on the desk to 1. Improve ergonomics and 2. clear up space on the desk taken up by a laptop. It is surprising how much of a footprint a laptop has especially when you use a separate keyboard and mouse with it anyway.

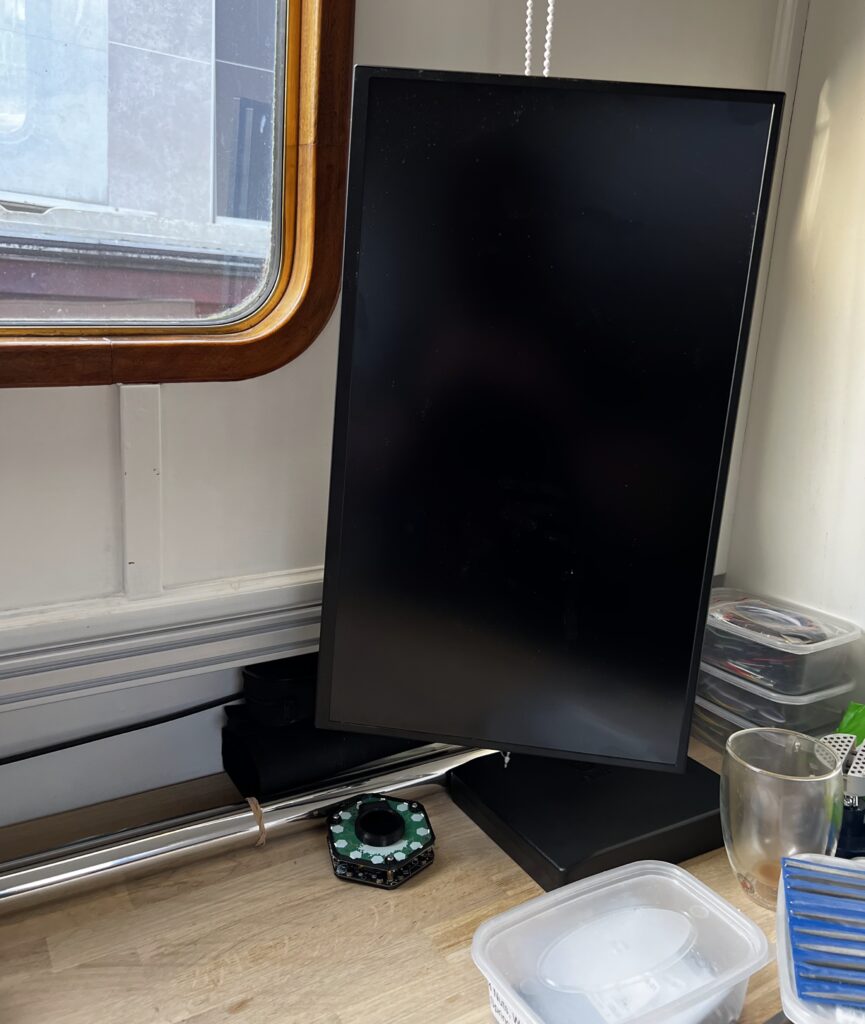
The monitor we have chosen is a 22″ 2K USB-C “Portable” monitor. We went with a portable as the weight and overall dimensions are optimised and they are USB-PD powered.
We also wanted the monitor mount to be extra flexible, to move the monitor out of the way or even hide it when we don’t need it. We came up with an idea to have a sliding rail on the back of the desk that a monitor arm could slide along. To add to this flexibility the monitor arm is a friction arm, or sometimes known as a magic arm. These are typically used for cameras so they have 1/4″-20 UNC thread and to make sure the arm did not rotate when the weight of the monitor was on it, we made sure the arm also had anti-rotation pins.
The rail is a 2040 V-slot aluminium extrusion and the carriage has 6x V-slot wheels in a rectangular form it give extra rigidity over the typical square ones. The extra set of wheels also enhance the grip the carriage has on the rail so that the monitor can be positioned at an angle and stretched away from the rail.
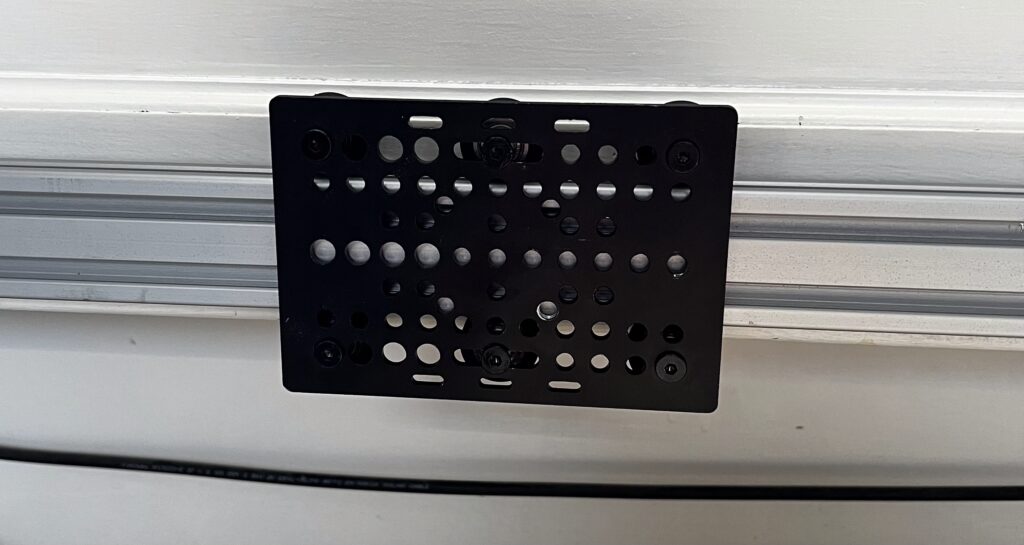
We did have some issues finding a VESA 75 mount that had a 1/4″-20 UNC thread. There was one which was about £20 but it did not have the anti-rotation features that we also needed. We also looked at camera “cheese” blocks, which basically have loads of threads all over a metal block so that you can attach accessories galore to your camera, but again, none that had both 1/4″ and anti-rotation.
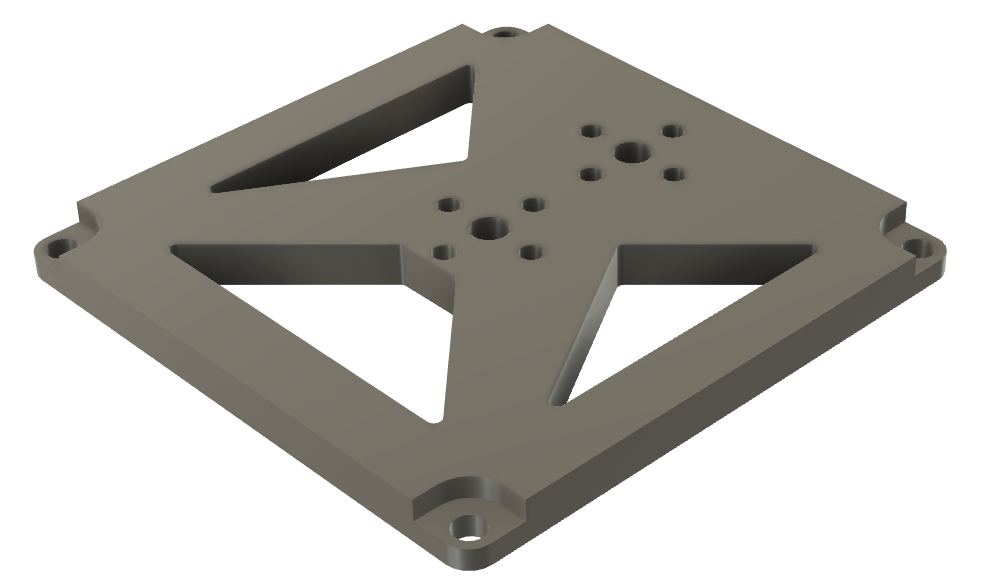
So we went custom and designed a plate in Fusion 360 that had all of the features we needed. We stated off simple, VESA 75 holes that would take M4 screws and a 5.2mm hole in the middle that will later be tapped to 1/4″-20 UNC. We then measured the anti-rotation pins and added them to the design. To give the option of having an offset mount, we copied the mount design to one side of the plate. The thread on the arm comes out by 6mm, so we got a 6mm piece of aluminium plate and once that had arrived the weight of it was.. noticeable, so we also designed some cutouts in the plate to reduce its weight. We also added recesses around the VESA screws so they didn’t stick out the back of the plate by too much.
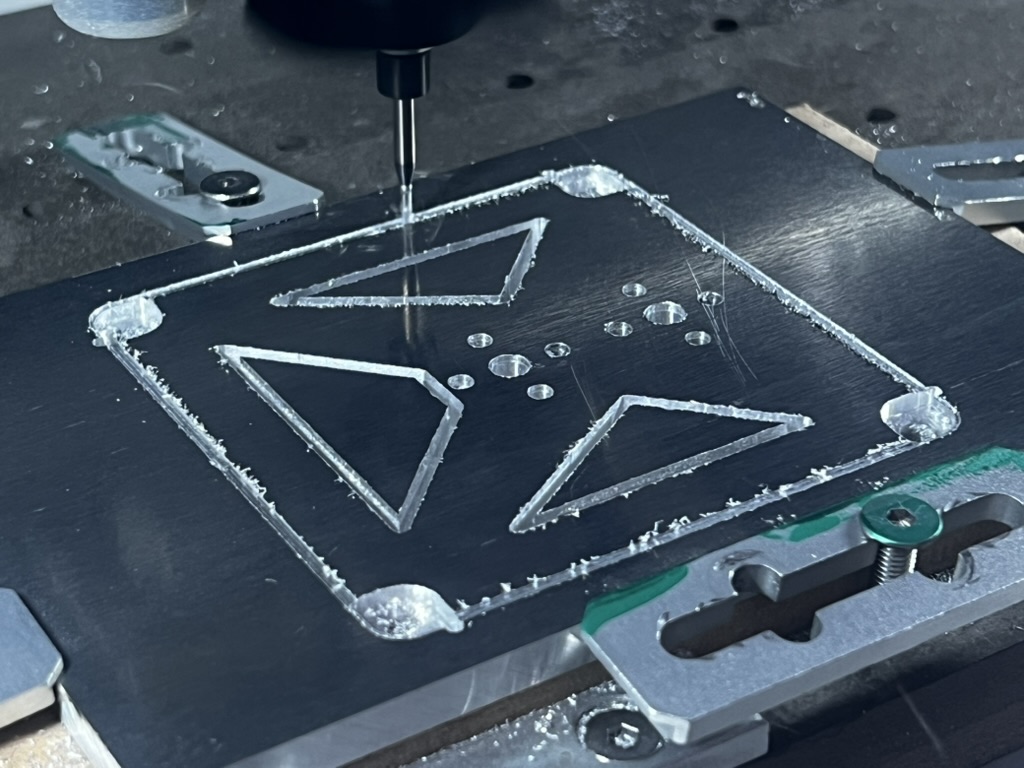
We machined this on the Carvera using a 1/16″ 4 flute end mill. which took about 4 hours and we got through three end mill bits.
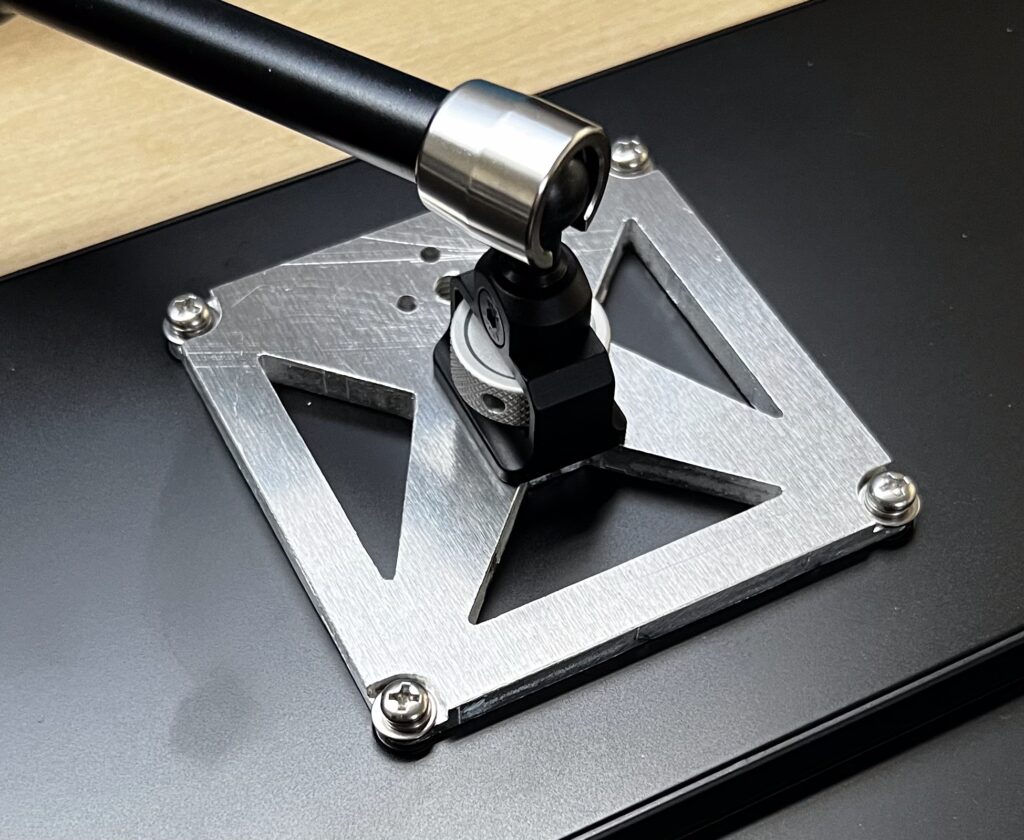
After some tidying up the edges, we tapped the thread and mounted it to the arm which aligned perfectly with the thread and the anti-rotation pins, and mounted it to the monitor with similar success.
The arm was already attached to the carriage and once loaded onto the rail the setup was complete.
This allows us to position the monitor wherever we want, including tilting, rotating to portrait, changing the height and sliding it to the side of the desk!
Leave a Reply